What makes modern metal guitar tones so specific? How to find your way and dial such tones with Blue Cat’s Axiom or Destructor?
Here are a couple of tips as well as many free presets to help you get started!
1. Start With The Right Preset!
Axiom and Destructor are both delivered with a few hi gain factory presets, some of which are best suited for modern metal tones:
These are usually labelled with “(IR)”. You can find them easily by searching this string in the presets manager of Axiom or Destructor:
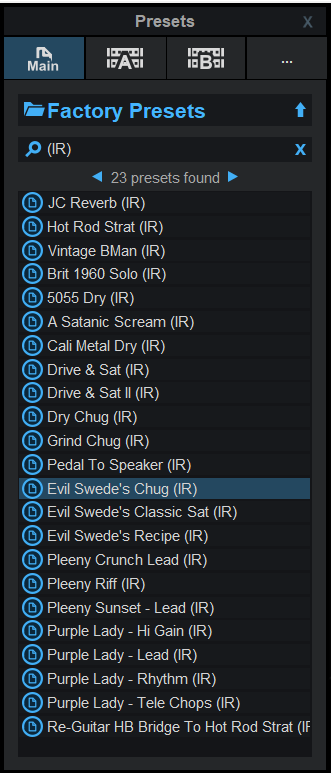
There is also a great collection of free Amp presets including some Seacow Cabs impulse responses for Destructor (=Axiom’s Amp Sim) that can be used as a starting point:
Download, install and try them out! It is much easier to use a preset as a basis than starting from scratch!
2. Use Impulse Responses (IR) for the cabinet simulation
For very high gain tones, the cabinet simulation is crucial to get the right color. With so many harmonics spread in the spectrum, it’s the shape of the post-filter (cab sim) that sculpts the tone. Most modern metal tones rely on the very specific colors of impulse responses for the cabinet simulation. Their shape is much more complex than traditional filters, as lots of comb filtering is happening there:

(you can read more about how to load custom impulse responses in Axiom & Destructor here).
If you still prefer to use non-IR cab simulation, you will probably still want to use the comb filter in the “post-filter” section of the amp sim, to get closer to what an IR sounds like:
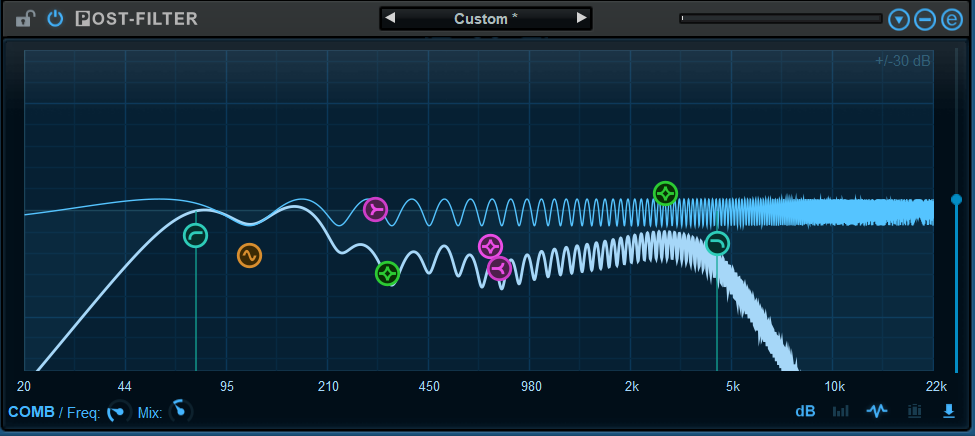
But as you can see, the shape is not as complex as the impulse response, so it will sound different (you may like it or not). Here is an example of our free Metal presets (also available for Destructor here) that do not use impulse responses. While they sound good, they are a bit less “modern”:
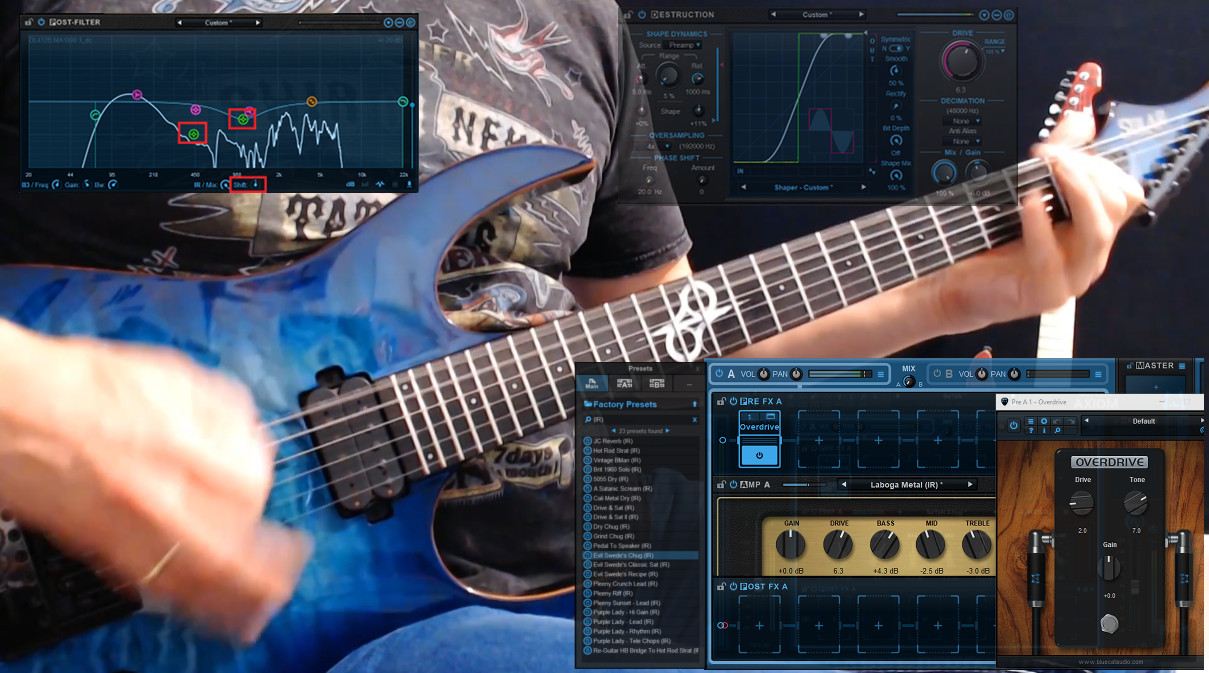
3. Use an Overdrive Pedal
It is usually better to reduce the gain of the amp simulation and add a (virtual) overdrive pedal in front of the amp sim, in order to spread the harmonics and get a more precise tone with still plenty of gain. No need to push the drive on the pedal too much: with typical built-in Axiom distortion pedals, you can set the drive around 2.

You will usually not want the pedal to add too much color to the guitar tone before it hits the amp simulation. So the “overdrive” pedals are usually a bit more neutral and work pretty well for the job.
But you can of course experiment with all sorts of pedals, and even create your own with Destructor.
4. Check Gain Staging
Although you might think about pushing all gain knobs all the way up to get more distortion, that’s not the way it works in the digital world.
You will want to make sure that the input level of all plug-ins remain close to 0 (the top of the meter) but does not go too far beyond. You may otherwise encounter either unwanted additional clipping, or with some particular amp models, it may even sound as if the dry signal is mixed with the distorted signal, because the distortion was calibrated for signals that remain below 0 dBFS.
Want more “gain”? Simply adjust the drive parameter of the amp sim, or add a distortion pedal in front of it!
5. Use Simple “Destruction” Settings
While the “Destruction” module of the amp simulation may have quite fancy settings for clean, crunch or vintage drive tones, with higher gain setups, you will usually want to stick with traditional (almost) static soft clipping curves:

You may also want to be cautious with the shape dynamics. Even if you still want to get some reactions of the amp on attacks, you will want to keep the range parameter quite low (a few percents max).
6. Choose the Right Preamp
All preamp curves are not suitable for modern guitar tones. High gain is generating a lot of harmonics, so you will usually not need that much brightness at the input (especially when already using am overdrive pedal). And you will definitely want to cut that low end, or it will produce lots of mud in the low-mid range.
Typical curves for modern metal preamps will look like this:

You can also use the preamp tone maps to tweak the tone without dealing with actual curves. Load the “Guitar/Typical/ preamp tone map, and explore within the following area:

If you are using an overdrive pedal, keep it on while exploring the preamp tones!
7. Higher Sample Rate is Better
Because you are generating quite a bit of distortion, use higher sample rates in the application, or use high oversampling the in “Destruction” stage to avoid aliasing when hitting high pitches.

If the sample rate is too low, you will quickly hear strange low frequencies when bending high pitched notes or even worse when using natural or artificial feedback – that’s typical of digital aliasing!
8. Use Compression
In order to get a consistent tone over time and avoid hitting the saturation stage too hard, you will usually want to make sure that you are using a bit of compression at the input of the amp simulation:

Do not overcompress though, or you will have no dynamics, and it will sound a bit to harsh and possibly very boring.
9. Tweak the EQ & Impulse Responses
While you may find great free (and commercial) impulse responses these days, you will usually want to tweak them quite a bit to find your tone.
Shift the spectrum of the IR and find the right spots for all these peaks, and add a bit of mid range scooping with the EQ:
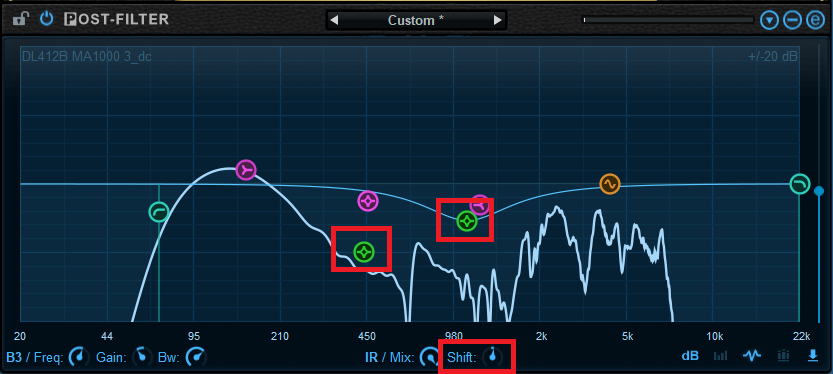
It is even possible to add some more color at specific frequencies with the comb filter.
10. Get Some Rest!
Don’t play with ear fatigue! The human ears and brain are great tools, but they get tired pretty quickly. If you search for a tone for too long, everything will end up sounding pretty bad to you ears, whatever the settings. When this happens, it’s probably time to stop and get some rest! Have a walk, a beer, a coffee or get some sleep, and come back to it later.
Sometimes you may want to save multiple presets (even if they do not sound THAT good) during a tone crafting session, and come back to it another day. You might be surprised by the presets that you will prefer the next day!
Also be careful with volume, as you may damage your ears forever playing too loud for too long!