Did you know that you can change the range of automation lanes for our plug-ins?
How?
First, show the controls settings buttons on the plug-in (third button from the top left):
![]()
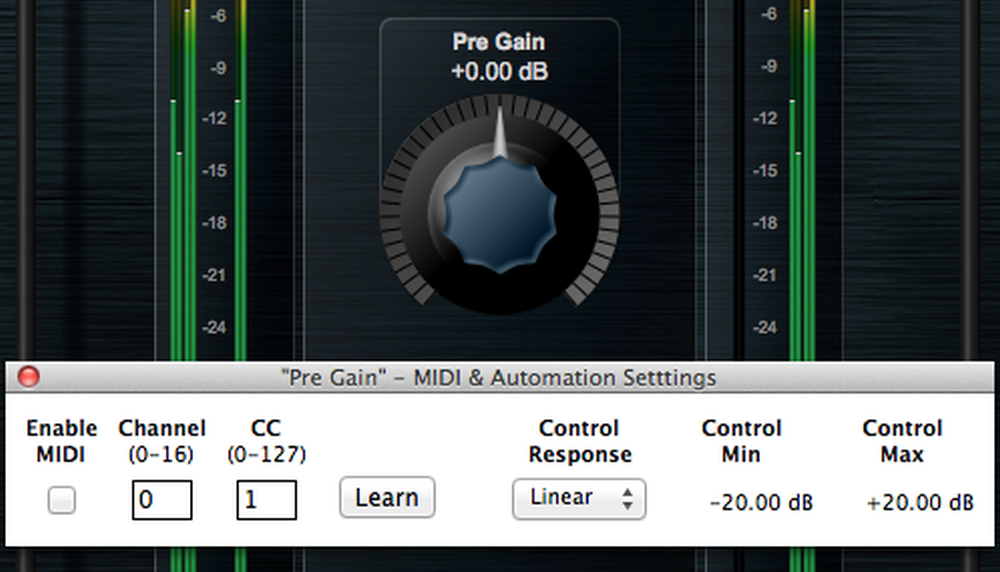
Second, open the settings menu for the control you want to modify (in this example, it’s the pre-gain control):

You can then choose the min/max values for automation lanes, as well as the response curve (default is linear, but you can choose among 13 curves):


Why?
It can be useful to change the range of controls for automation if you already have automation lanes that you don’t want to modify, but which do not exactly match what you expect (for example if they have been generated by another plug-in). This lets you tweak automation in real time, without having to rewrite the entire lane.
You may also want to change these settings when using a control surface to control the plug-in: setting the range will give you more precision, and changing the curve may help you get a better fit with your control surface.
Anything Else?
The settings shown above apply to the current instance of the plug-in. You can also change the default values for all instances (if not already set) using the global settings pane of the plug-in.
You can also access the full list of control ranges by opening the current presets settings window (useful to verify all settings at once).
… And there is much more in the manual! 🙂