Blue Cat Audio on FacebookFollow Blue Cat Audio on TwitterFollow Blue Cat Audio on InstagramBlue Cat Audio's Official Youtube ChannelThe Blue Cat Audio ForumThe Blue Cat Audio Blog - The Dark Side of the Cat
Blue Cat Audio - Software Made by Musicians for Musicians
Tutorial - Simple Dynamic Stereo Enhancement

This tutorial shows how to use the DP Meter Pro and the freeware Gain Suite plugins to enhance the stereo perception of a track. It's a very simple example of how to connect the measurements capabilities of the Widening Meter Pro to other plug-ins parameters:

The principle is to use the Mid channel level to influence the side channel gain. This way the stereo perception of the sound is dynamically modified, depending on how loud the mid channel is.

This tutorial uses Cakewalk Sonar 6 as a host application, but any directX or VST compatible host that supports MIDI routing will work. See our DP Meter Pro Tutorials for more information about how to use MIDI routing in other applications such as Ableton Live, Steinberg Cubase, Energy XT, Sony Vegas etc.

Step By Step

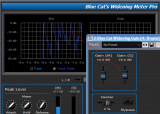
01 - Insert the Widening Meter Pro in the source audio track:

Step 01 - Insert the Widening Meter Pro in the source audio track

02 - Open the presets settings window:

Step 02 - Open the presets settings window

03 - In the MIDI output pane, check the 'use global settings' box, and setup the MIDI parameters for the transformed peak parameter:

Step 03 - In the MIDI output pane, check the 'use global settings' box, and setup the MIDI parameters for the transformed peak parameter

04 - Open the synth rack view:

Step 04 - Open the synth rack view

05 - Enable MIDI output for the Widening Meter Pro - it is now setup to send Mid gain information as MIDI CC:

Step 05 - Enable MIDI output for the Widening Meter Pro - it is now setup to send Mid gain information as MIDI CC

06 - Insert the Widening gain after the Widening Meter Pro on the same track:

Step 06 - Insert the Widening gain after the Widening Meter Pro on the same track

07 - Open the preset settings window for the Widening Gain:

Step 07 - Open the preset settings window for the Widening Gain

08 - Enable the side gain MIDI control and affect it to the same MIDI CC as the Widening Meter Pro output:

Step 08 - Enable the side gain MIDI control and affect it to the same MIDI CC as the Widening Meter Pro output

09 - Insert a new MIDI track:

Step 09 - Insert a new MIDI track

10 - Assign the MIDI output of this track to th eWidening Gain plug-in - it is now setup to receive the Widening Meter Pro MIDI events:

Step 10 - Assign the MIDI output of this track to th eWidening Gain plug-in - it is now setup to receive the Widening Meter Pro MIDI events

11 - Depending on your host software, you may want to check that MIDI echo is on:

Step 11 - Depending on your host software, you may want to check that MIDI echo is on

12 - Play the song, and see how the side gain moves according to the track mid level:

Step 12 - Play the song, and see how the side gain moves according to the track mid level

13 - Adjust the offset and amount parameters depending on how strong you want the widening effect to be:

Step 13 - Adjust the offset and amount parameters depending on how strong you want  the widening effect to be
You have learnt how to use the DP Meter Pro plugin MIDI output to control the Gain Suite side gain in real time and produce a dynamic stereo enhancement effect. You can now apply the same method to perform side chain Mid-Side ducking (apply the gain to another audio track than the source track) or to control other effects with the mid or side envelope. You can also try to use the RMS envelope for a more "loudness-related" effect, and control the mid gain with the sides level, reverse the envelope (for a kind of mid-side compression effect). Anything is possible, just experiment and have fun!

Any questions, comments? You want to submit your own tutorial to win a free license? Please post on our Forum!