This tutorial shows how to perform multi band side chain compression, ducking or gating with Blue Cat's MB-5 Dynamix and Blue Cat's MB-7 Mixer.
"Side chaining" consists in using the signal of a track to control an effect on another track.
In our case, we will use the Blue Cat's MB-5 Dynamix plug-in on the source track (a Hip Hop drums track). It will compute gain values that we want to apply to multiple bands thanks to its multiband dynamics processing algorithms. But the effect won't be applied to the source track (we'll set the dry/wet mix to full dry). These gain values will be applied to multiple bands on the destination track (a hip hop fat bass synth track), thanks to the Blue Cat's MB-7 Mixer plug-in:

We will also show in this tutorial how to monitor both the source and destination frequency bands to tweak the effect.
Note: this tutorial uses Cockos Reaper as a host, but you can use any other host provided that it supports either MIDI CC or parameters routing. For more information, check our other Tutorials to understand how to connect our plug-ins together in other hosts.
Step By Step
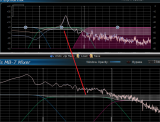
01 - Insert the plug-ins on the source (1) and destination (2) tracks:
 and destination (2) tracks.png "Step 01 - Insert the plug-ins on the source (1) and destination (2) tracks")
02 - On the source plug-in (MB-5 Dynamix), select a preset you want to start your settings from:
, select a preset you want to start your settings from.png "Step 02 - On the source plug-in (MB-5 Dynamix), select a preset you want to start your settings from")
02.1 - Note:
The output brickwall limiter should not be used, since it cannot bypassed with the dry/wet knob.
02.2 - On the source plug-in (MB-5 Dynamix), turn the Dry-Wet knob down to zero (so that the plug-in has no effect on the source track):
, turn the Dry-Wet knob down to zero (so that the plug-in has no effect on the source track).png "Step 02.2 - On the source plug-in (MB-5 Dynamix), turn the Dry-Wet knob down to zero (so that the plug-in has no effect on the source track)")
03 - On the source plug-in, open the preset settings:

04 - Activate MIDI output for all total gain parameters for channel 1 (we'll set up the plug-in for mono dynamics only):
.png "Step 04 - Activate MIDI output for all total gain parameters for channel 1 (we'll set up the plug-in for mono dynamics only)")
05 - Setup the destination track to receive all MIDI events from the source track:

06 - Open the preset settings on the MB7-Mixer plug-in (destination track):
.png "Step 06 - Open the preset settings on the MB7-Mixer plug-in (destination track)")
07 - Setup the MB-7 Mixer's MIDI input so that the gain for each band receives the output gain events configured on the MB-5 Dynamix plug-in:

07.1 - Plug-ins are now connected with each other:
The plug-ins are now configured so that dynamics changes computed by the MB-5 Dynamix plug-in on the source track are sent to the MB-7 Mixer plug-in on the destination track.
08 - Setup the number of bands on the MB-7 Mixer plug-in and adjust frequency ranges:

08.1 - Note:
Frequency ranges on the source and destination track will probably be different, since the instruments have different characteristics. You can adjust them freely, depending on the desired effect.
09 - Hit Play - the MB-7 Mixer plug-in is now controlled by the MB-5 Dynamix plug-in:

10 - You can now tweak the settings on the source MB-5 Dynamix plug-in to control the effect:

10.1 - Tips:
Once you get closer to the desired effect, you may want to adjust the source and destination crossovers (frequencies, steepness) to perfectly match the appropriate spectrum both for the trigger (source) and the effect (destination).
10.2 - As an example of application, you can get a very interesting effect using the bass drum to trigger a gate on the lower end of the bass synth track:

10.3 - Tip - If you need better precision for control data (fast attack), just increase the data rate in the global settings:
, just increase the data rate in the global settings.png "Step 10.3 - Tip - If you need better precision for control data (fast attack), just increase the data rate in the global settings")
You are now able to use the side-chaining capabilities of Blue Cat's MB-5 Dynamix and MB-7 Mixer plug-ins to create multiband side chain dynamics effects. You can experiment the impact of compression, expansion or gating between different instruments with various frequency ranges.
You can of course extend this tutorial using your own settings, but also using different parameters: you can for example use the "pan" or "spread" parameters as destinations (instead of the gain) for dynamics-based stereo control.
Enjoy, and send us the results of your experimentations!
Any questions, comments? You want to submit your own tutorial to win a free license? Please post on our Forum!