 In this tutorial you will learn how to use the DP Meter Pro plugin (DPMP)'s real time capabilities in Steinberg Cubase: use it to let any instrument influence the parameters on any effect for any other instrument in a 'live' context. This tutorial shows these capabilities with Blue Cat's free audio effect.
Step By Step
01 - Insert the DPMP on the source track:

02 - Select the DPMP preset settings in the main menu (right click on the background):
.png "Step 02 - Select the DPMP preset settings in the main menu (right click on the background)")
03 - Enable the DPMP Midi output for the transformed peak envelope, and set the CC number:

04 - Insert the target fx (Stereo Chorus) on the target track:
 on the target track.png "Step 04 - Insert the target fx (Stereo Chorus) on the target track")
05 - Select the chorus presets settings in the main menu:

06 - Enable the chorus MIDI input for chosen parameters, and set the Channel to Omni (0) and the MIDI CC to the same value as for the DPMP output:
 and the MIDI CC to the same value as for the DPMP output.png "Step 06 - Enable the chorus MIDI input for chosen parameters, and set the Channel to Omni (0) and the MIDI CC to the same value as for the DPMP output")
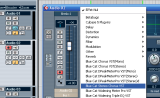
07 - Insert a MIDI track:

08 - Setup the MIDI track input to Peak Meter, output to the Stereo Chorus VST and select 'all' channels:

09 - Setup MIDI track monitor on:

10 - Enable input echo on both tracks and play - the source track triggers the target track chorus parameters in real time:

11 - Hide the RMS curves on the DPMP to monitor only the peaks:

12 - Tweak the Amount and offset parameters of the DPMP:

13 - Tweak the Chorus MIDI response curve parameters (Min,Max,Response):
.png "Step 13 - Tweak the Chorus MIDI response curve parameters (Min,Max,Response)")
14 - Tweak the DPMP MIDI output response:

15 - Enjoy and play:

Any questions, comments? You want to submit your own tutorial to win a free license? Please post on our Forum!